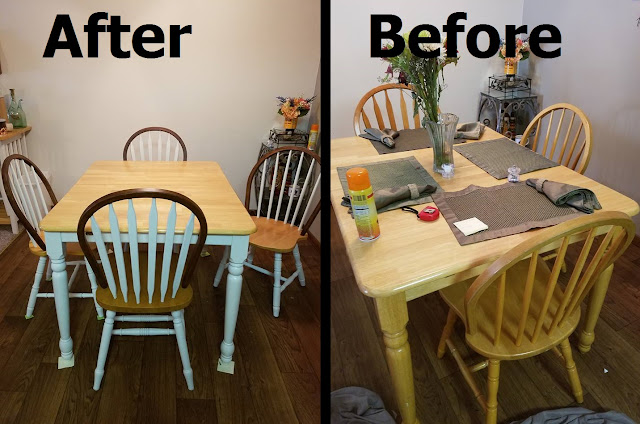
Dining Room Set Make-Over
Patrick got a hand-me-down dining room table set from his dad when he went to college. It's super sturdy and the leaf automatics pops up when you expand the table, which is cool.
As functional as it is, it was in rough aesthetic condition. It had definitely seen it's fair share of quarters, beer pong and everything else boys do in college. We looked at getting a new set, but it was spendy.
After 3 days of blood, sweat, and a sore back, here's what we got:
Not too bad, right? Unlike the other table make over I did, this one would not be economical to sell because it took so much time to do. But if it's just for you, it's well with it!
Materials:
-sandpaper
-gel stain
-cloth scraps
-2-3 foam brushes
-1 small roller
-interior paint
-paint sealer (to save time, I used the spray can kind)
-paint tray
-sandpaper
-gel stain
-cloth scraps
-2-3 foam brushes
-1 small roller
-interior paint
-paint sealer (to save time, I used the spray can kind)
-paint tray
The table
1. Wash the table and let dry
2. Lightly sand the table and wipe down
*optional: if you are picky about paint getting on the underside if the table, you can use painter's tape to protect it. I didn't care, so I skipped this part. If you're looking at the underside if my dining room table, you're probably too dunk to criticize me.
3. Roll your paint on a table leg with your roller.
4. Use the foam brush to fill in the parts the roller missed. Be sure to do more dabbing rather than strokes.
5. Do this to the rest of the table
6. After drying, spray with sealer
Chairs:
1. Clean chair
2. Lightly sand chair and wipe it down
1. Clean chair
2. Lightly sand chair and wipe it down
*optional: if you are picky about paint getting on the underside of your chairs, you can use painter's tape to protect it. To see why I didn't care, see the above *
3. Roll your paint on the chair legs with your roller.
4. Use the foam brush to fill in the parts the roller missed. Be sure to do more dabbing rather than strokes. (Do a thorough check to make sure you didn't miss any spots)
5. Take a roller and paint the spindles of the chair. Use a foam brush to fill in the parts the roller missed. Be sure to do more dabbing rather than strokes.
*optional: you can take the time to tape each spindle, or you can do what I did. I'm sure they amount to taking the same time, but it felt like I was saving time my way.
6. If you are avoiding taping (highly advised), apply your paint as close to the bases of the spindles as possible without getting paint on unwanted areas. Then, use a small artist's paintbrush to paint the left over areas. If any paint does get in unwanted areas, use a tooth pick to scrape it away.
7. Using a scrap of cloth, apply the gel stain to the back of your chair.
*note: you can tape these parts, but I found it was less tedious to use a piece of cardboard to block the stain from the parts I did not want the to be stain. Before it dried, I took a tooth pick and scraped away the strain in the unwanted areas.
7. Wait for the paint/ stain to fully dry
8. Apply paint sealer
(Before)
(During...Yikes)
(After)


No comments:
Post a Comment